Custom Templates - Google Tag Manager (GTM)
May 24, 2019 - in Analytics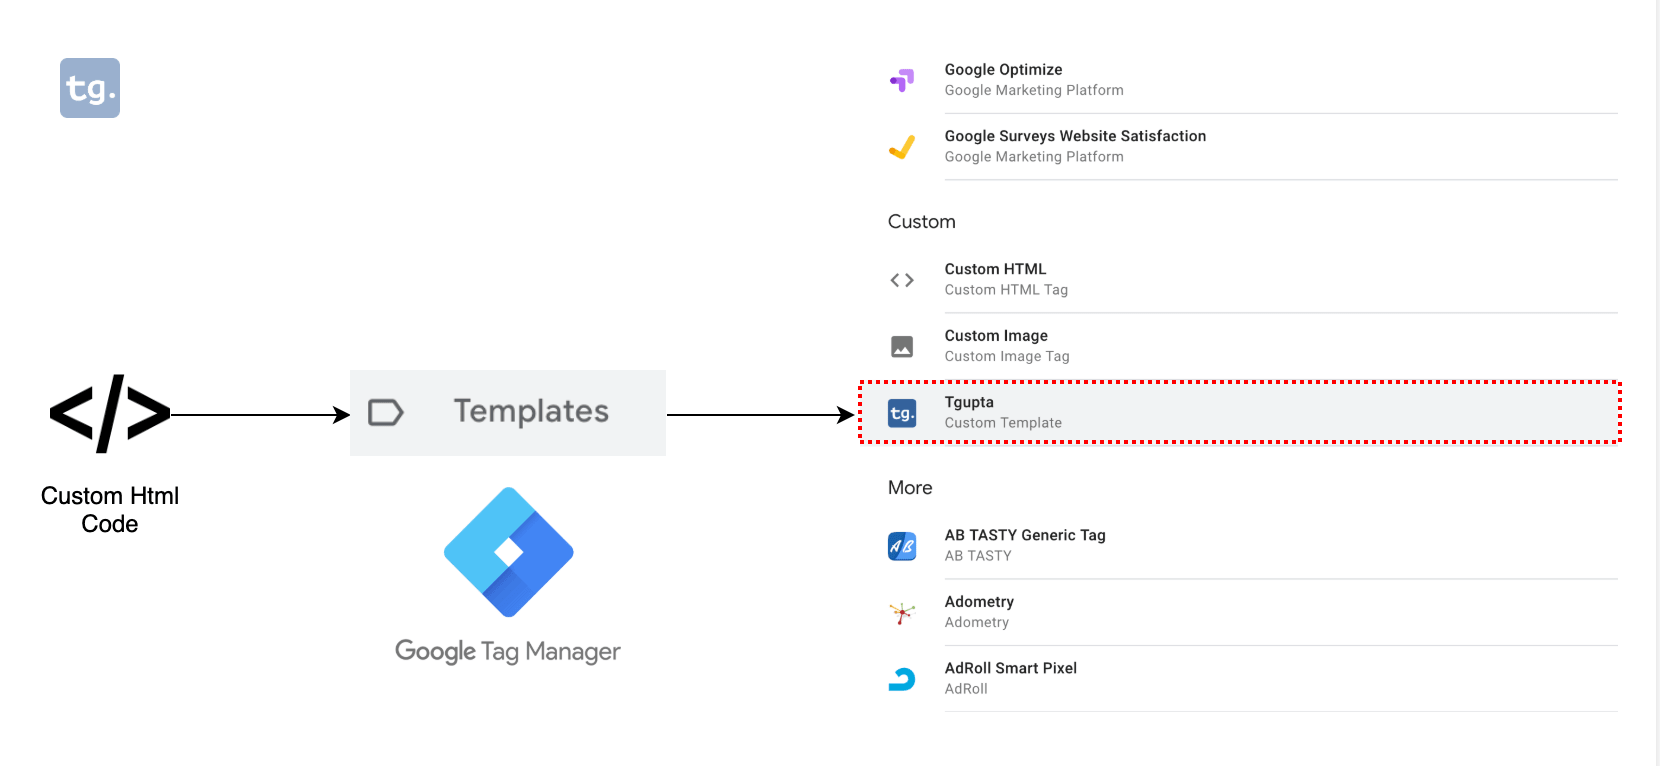
Google Tag Manager (GTM) just dropped a new add-on called Custom Templates. This templates feature allows users to write their own tag and variable definitions so that others within your organization can use them alongside built-in tags list.
Table of Contents
Defining Custom Templates in Google Tag Manager (GTM).
In simple terms, the custom templates is a way of templatizing a custom code with its own interface so that you just have to input the important values and the tag will fire based on the triggers along with the values provided. It abstracts the complex code inside a Custom HTML code and helps to achieve a consistent and efficient way to use.
Custom Templates Components

There are four major Components for custom Templates in Google Tag Manager (GTM).
- Info - In this tab, you define the basic properties of the template, such as the tag or variable name and icon.
- Fields - this is a visual editor to add input fields to your tag template
- Code - you can use sandboxed JavaScript here to define how your tag or variable should behave
- Permissions - set the permissions of the tag and limit what the tag must do.
Objective
We want to create a tag template which sends the hit to http://tgupta.net/collect with any parameters we specify.
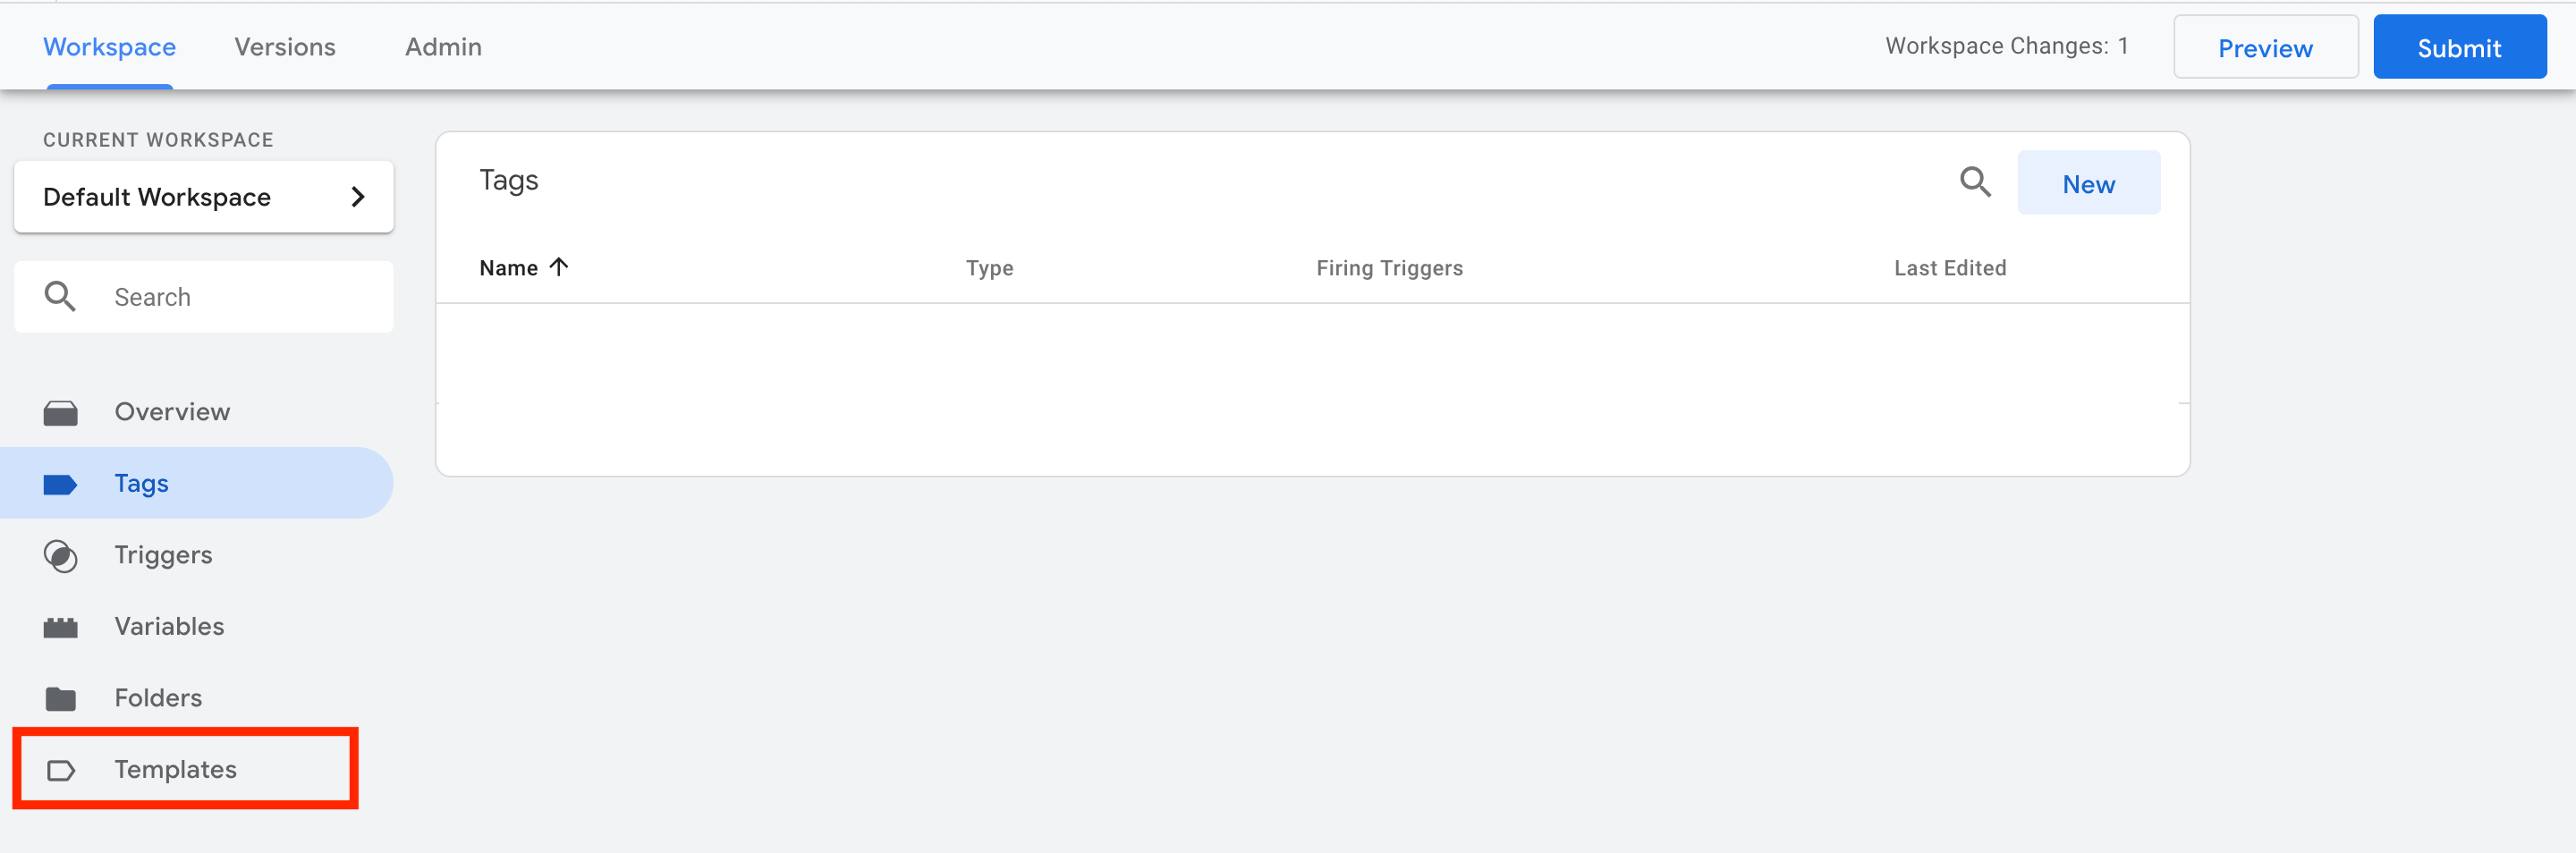
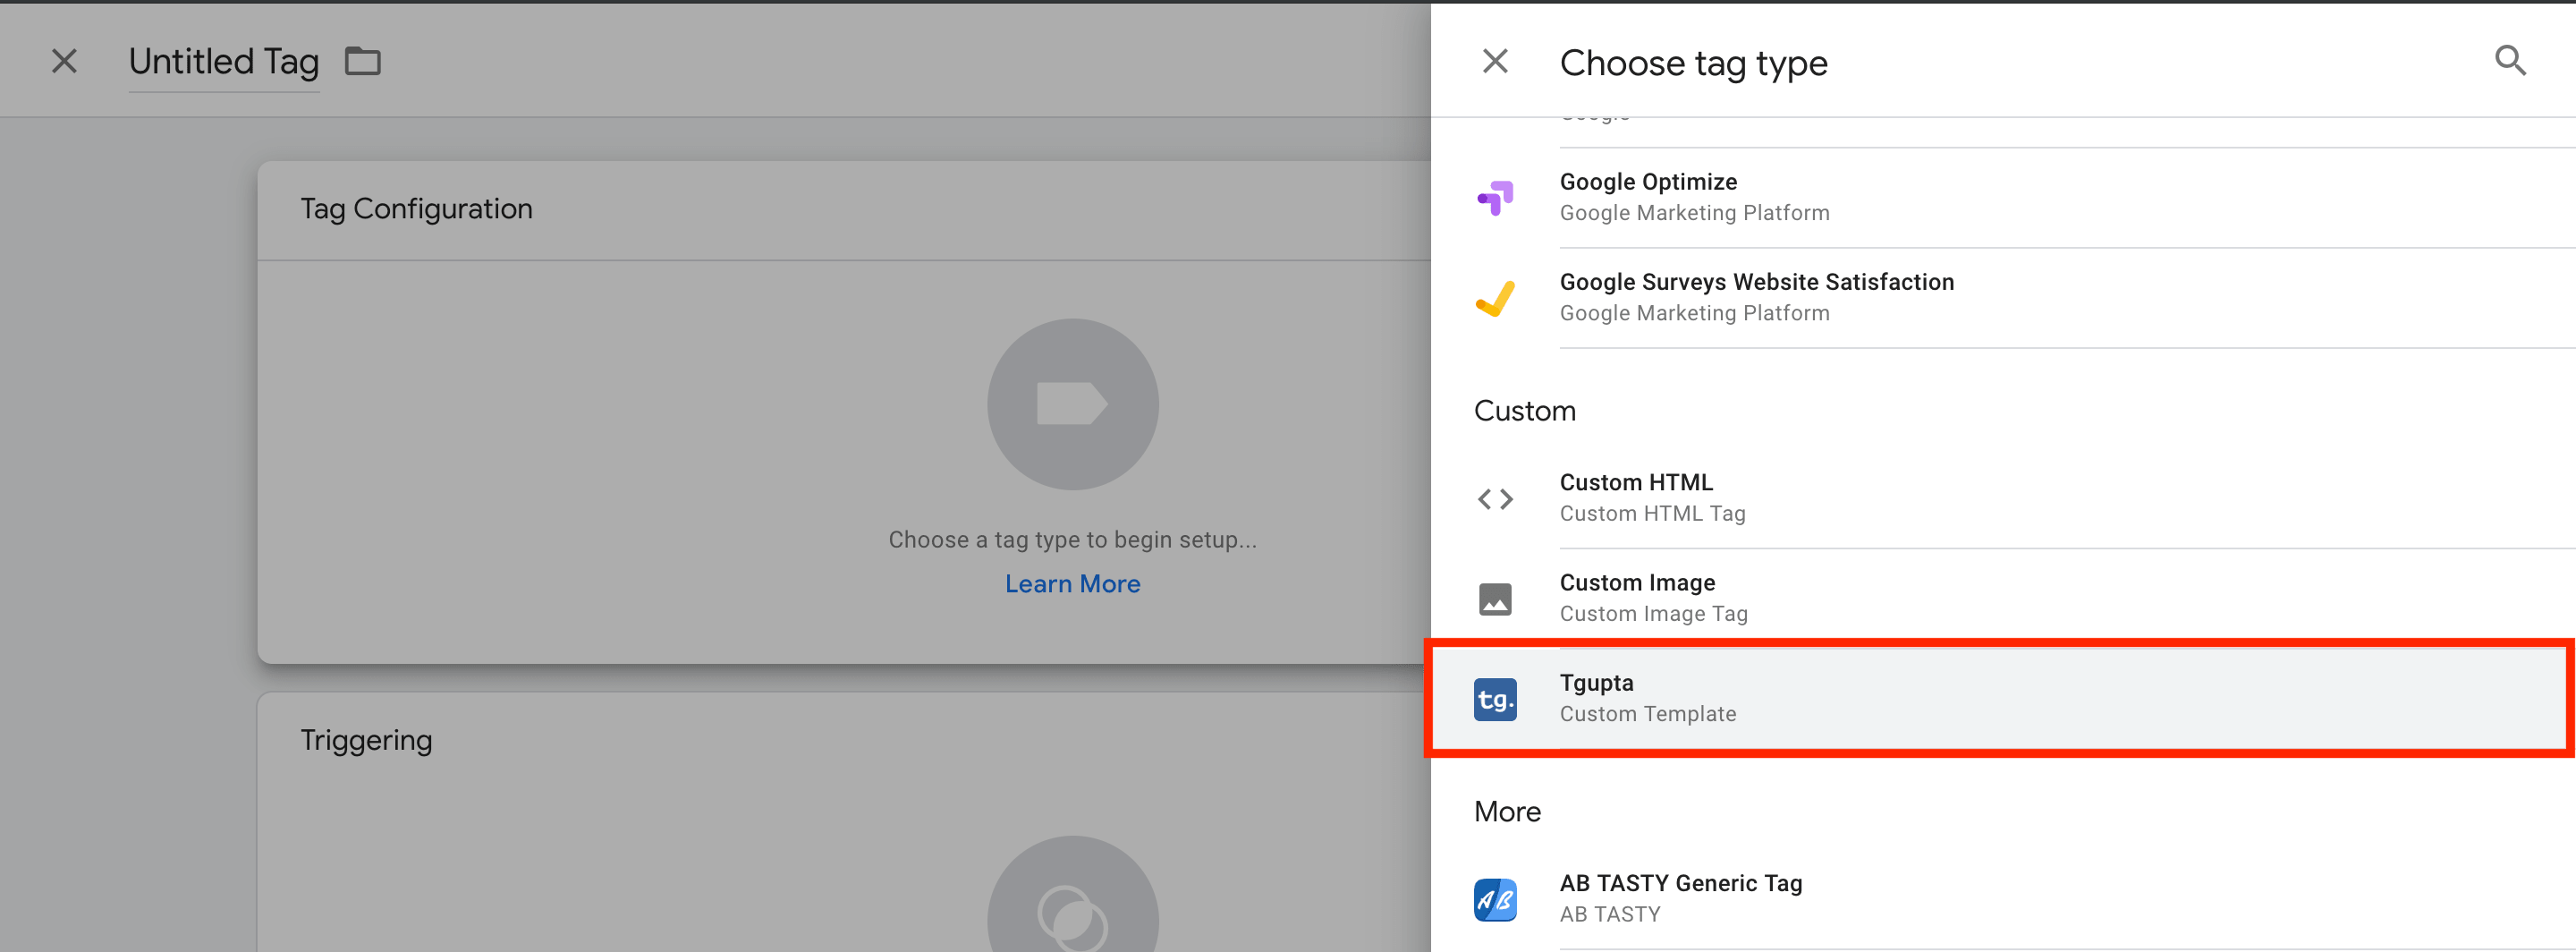
- Go to Google Tag Manager
- Select your workspace
- Go to Templates on the left sidebar.
- Click New in the template section
Info - Tab
Here we define the basic information about the template
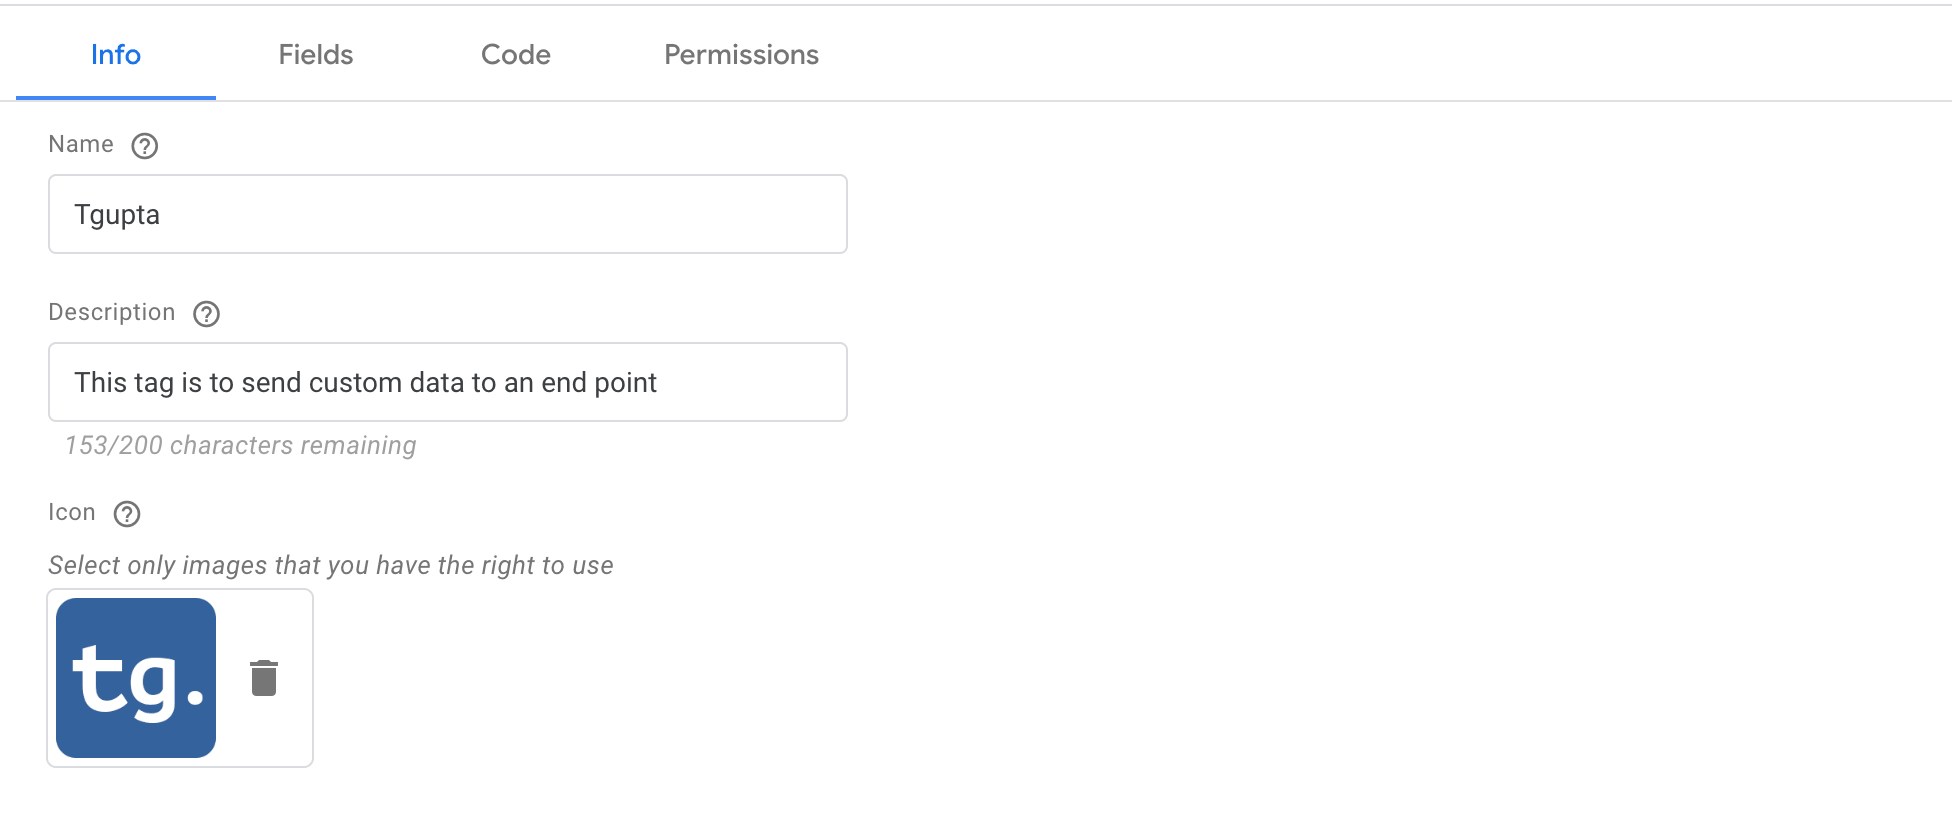
- Name: - the name of the tag type you want to see in the list of tags
- Description:- Describe what does this tag do
- Logo: - Add a brand image of your own.
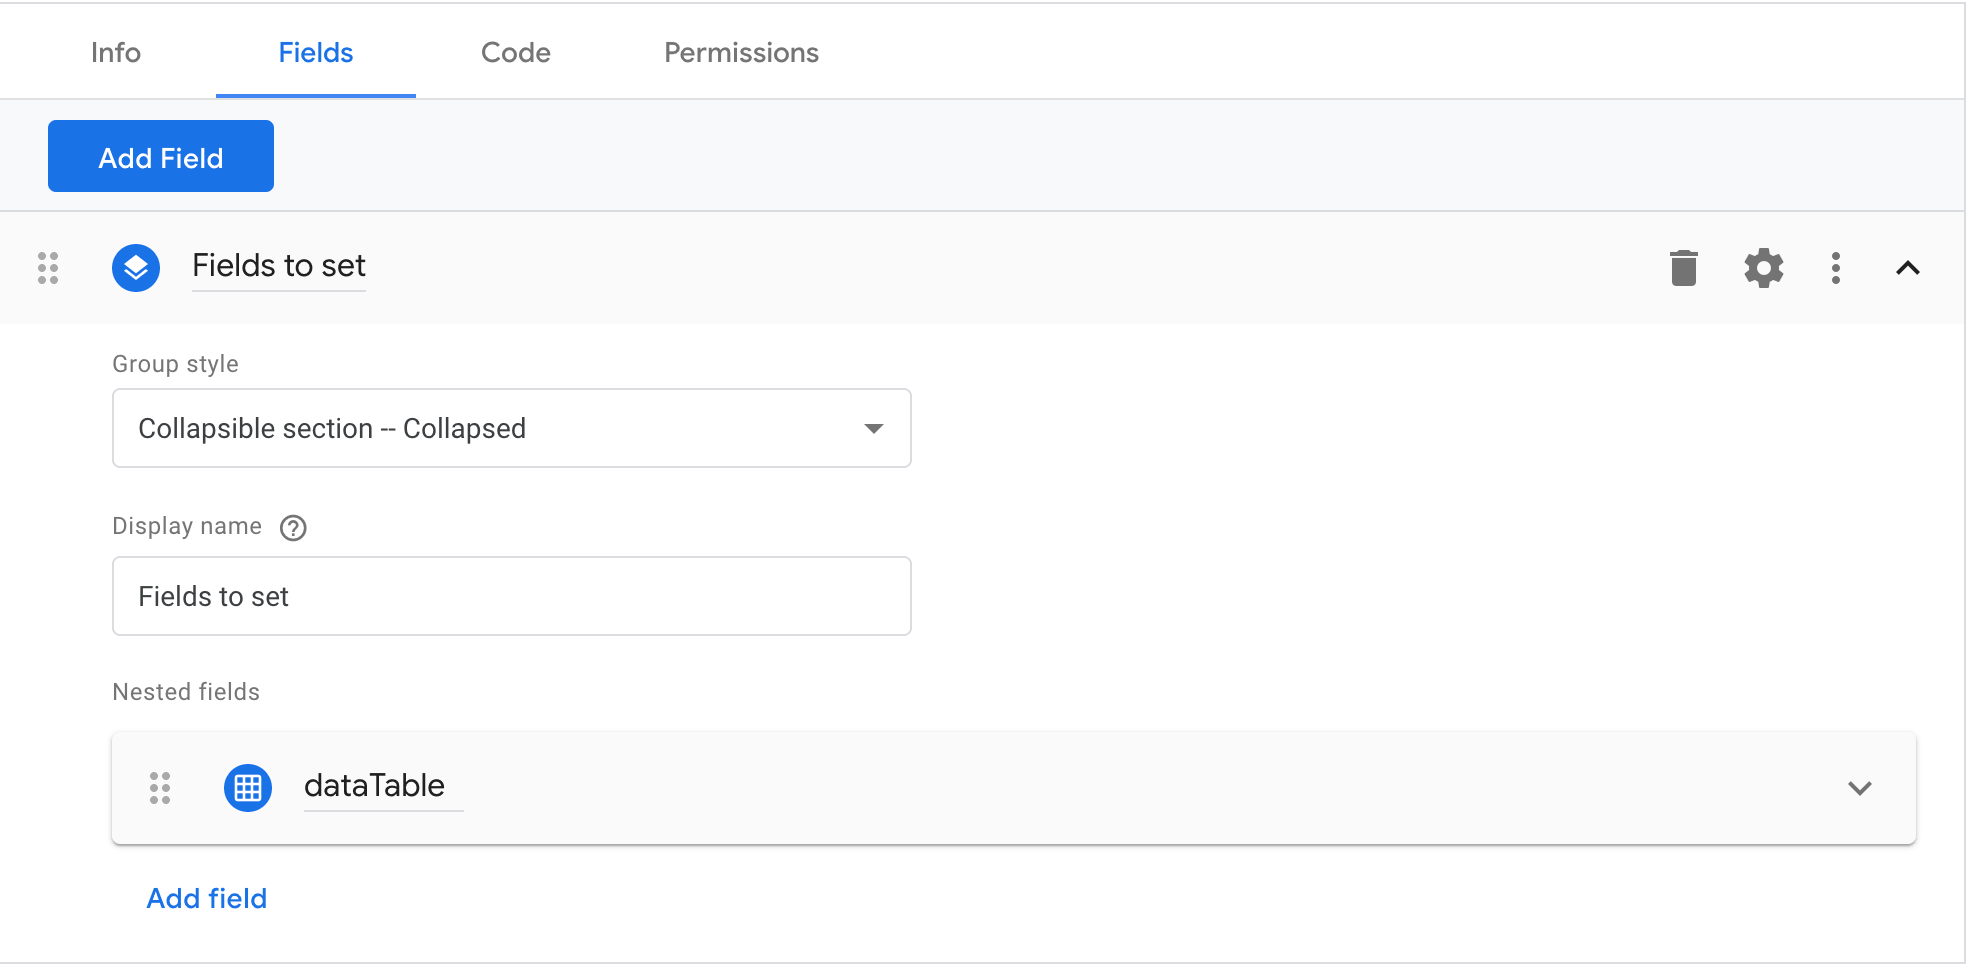
Fields - Tab
Next what we want to do is, give users a UI to input parameter name and values. You can add the standard form elements like text fields, drop-down menus, radio buttons, and checkboxes. The UI we intend to give is something like below
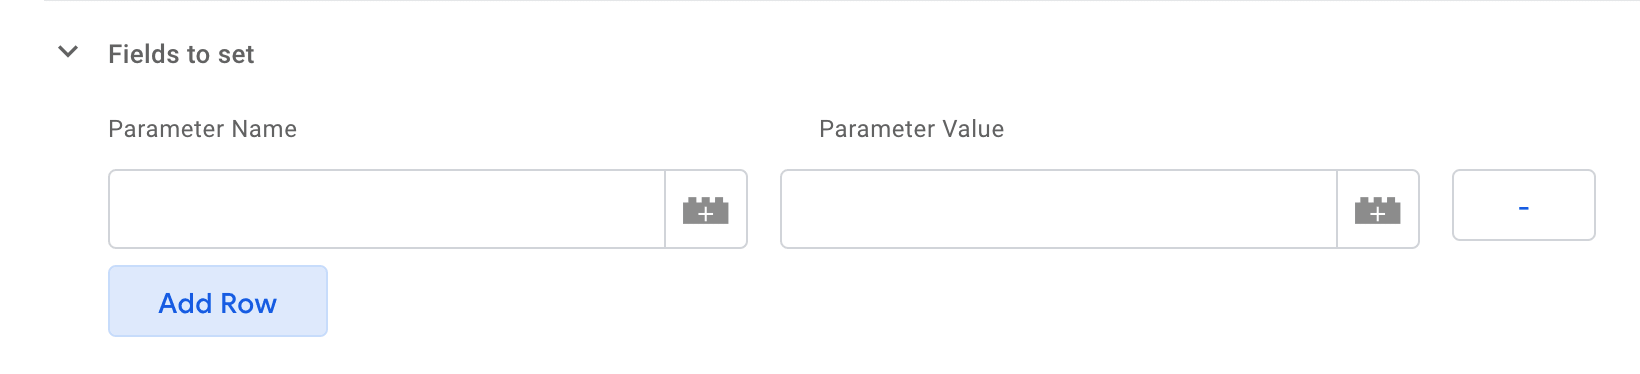
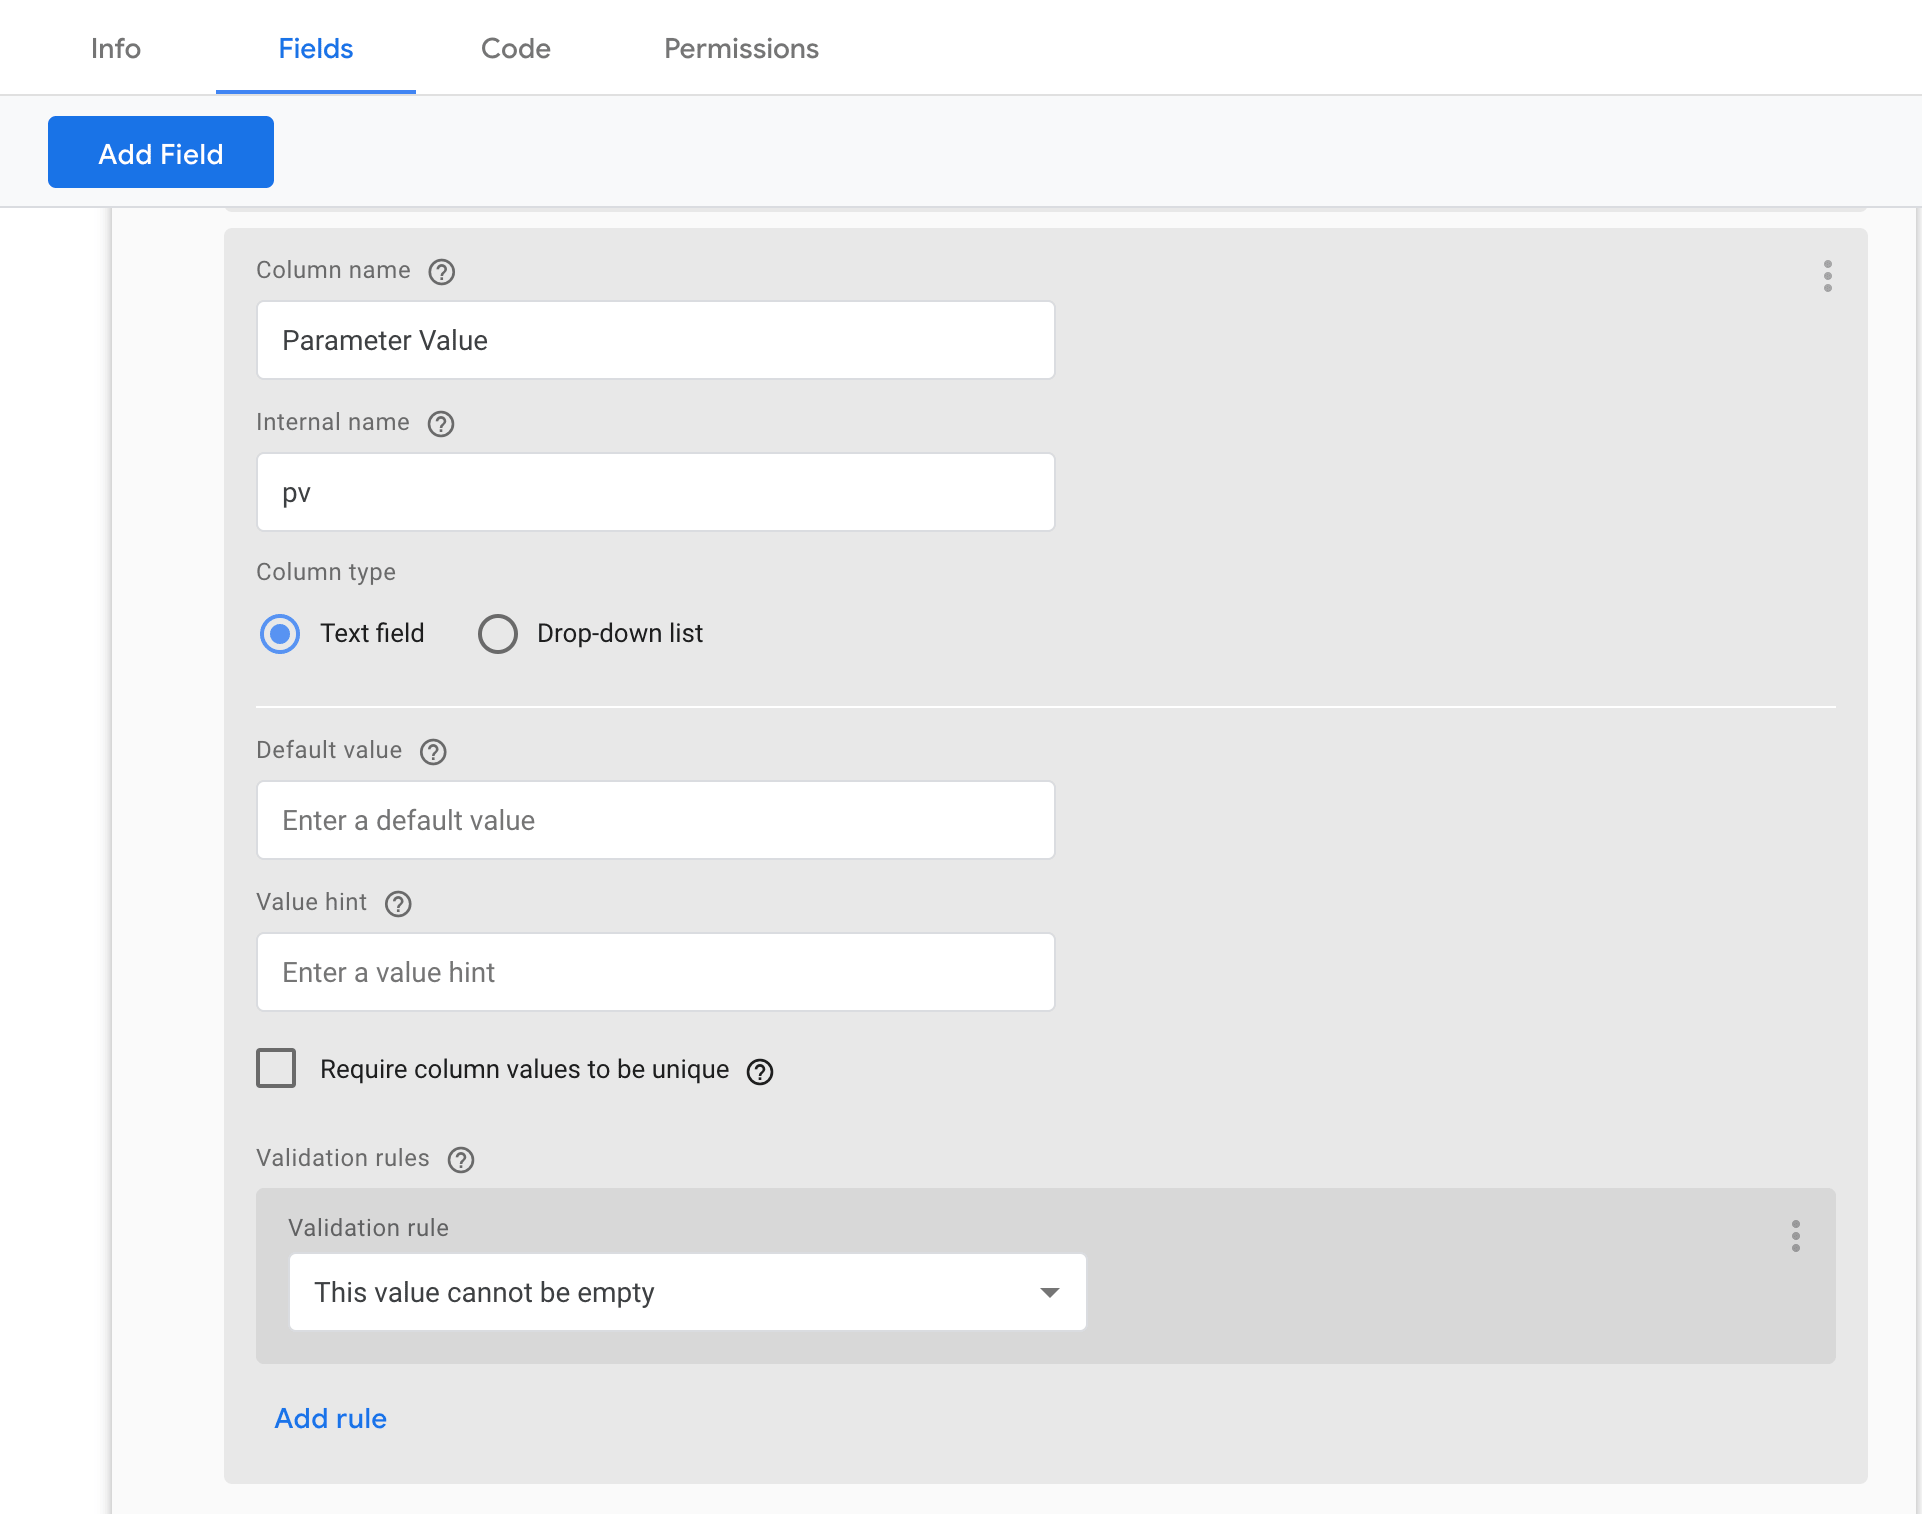
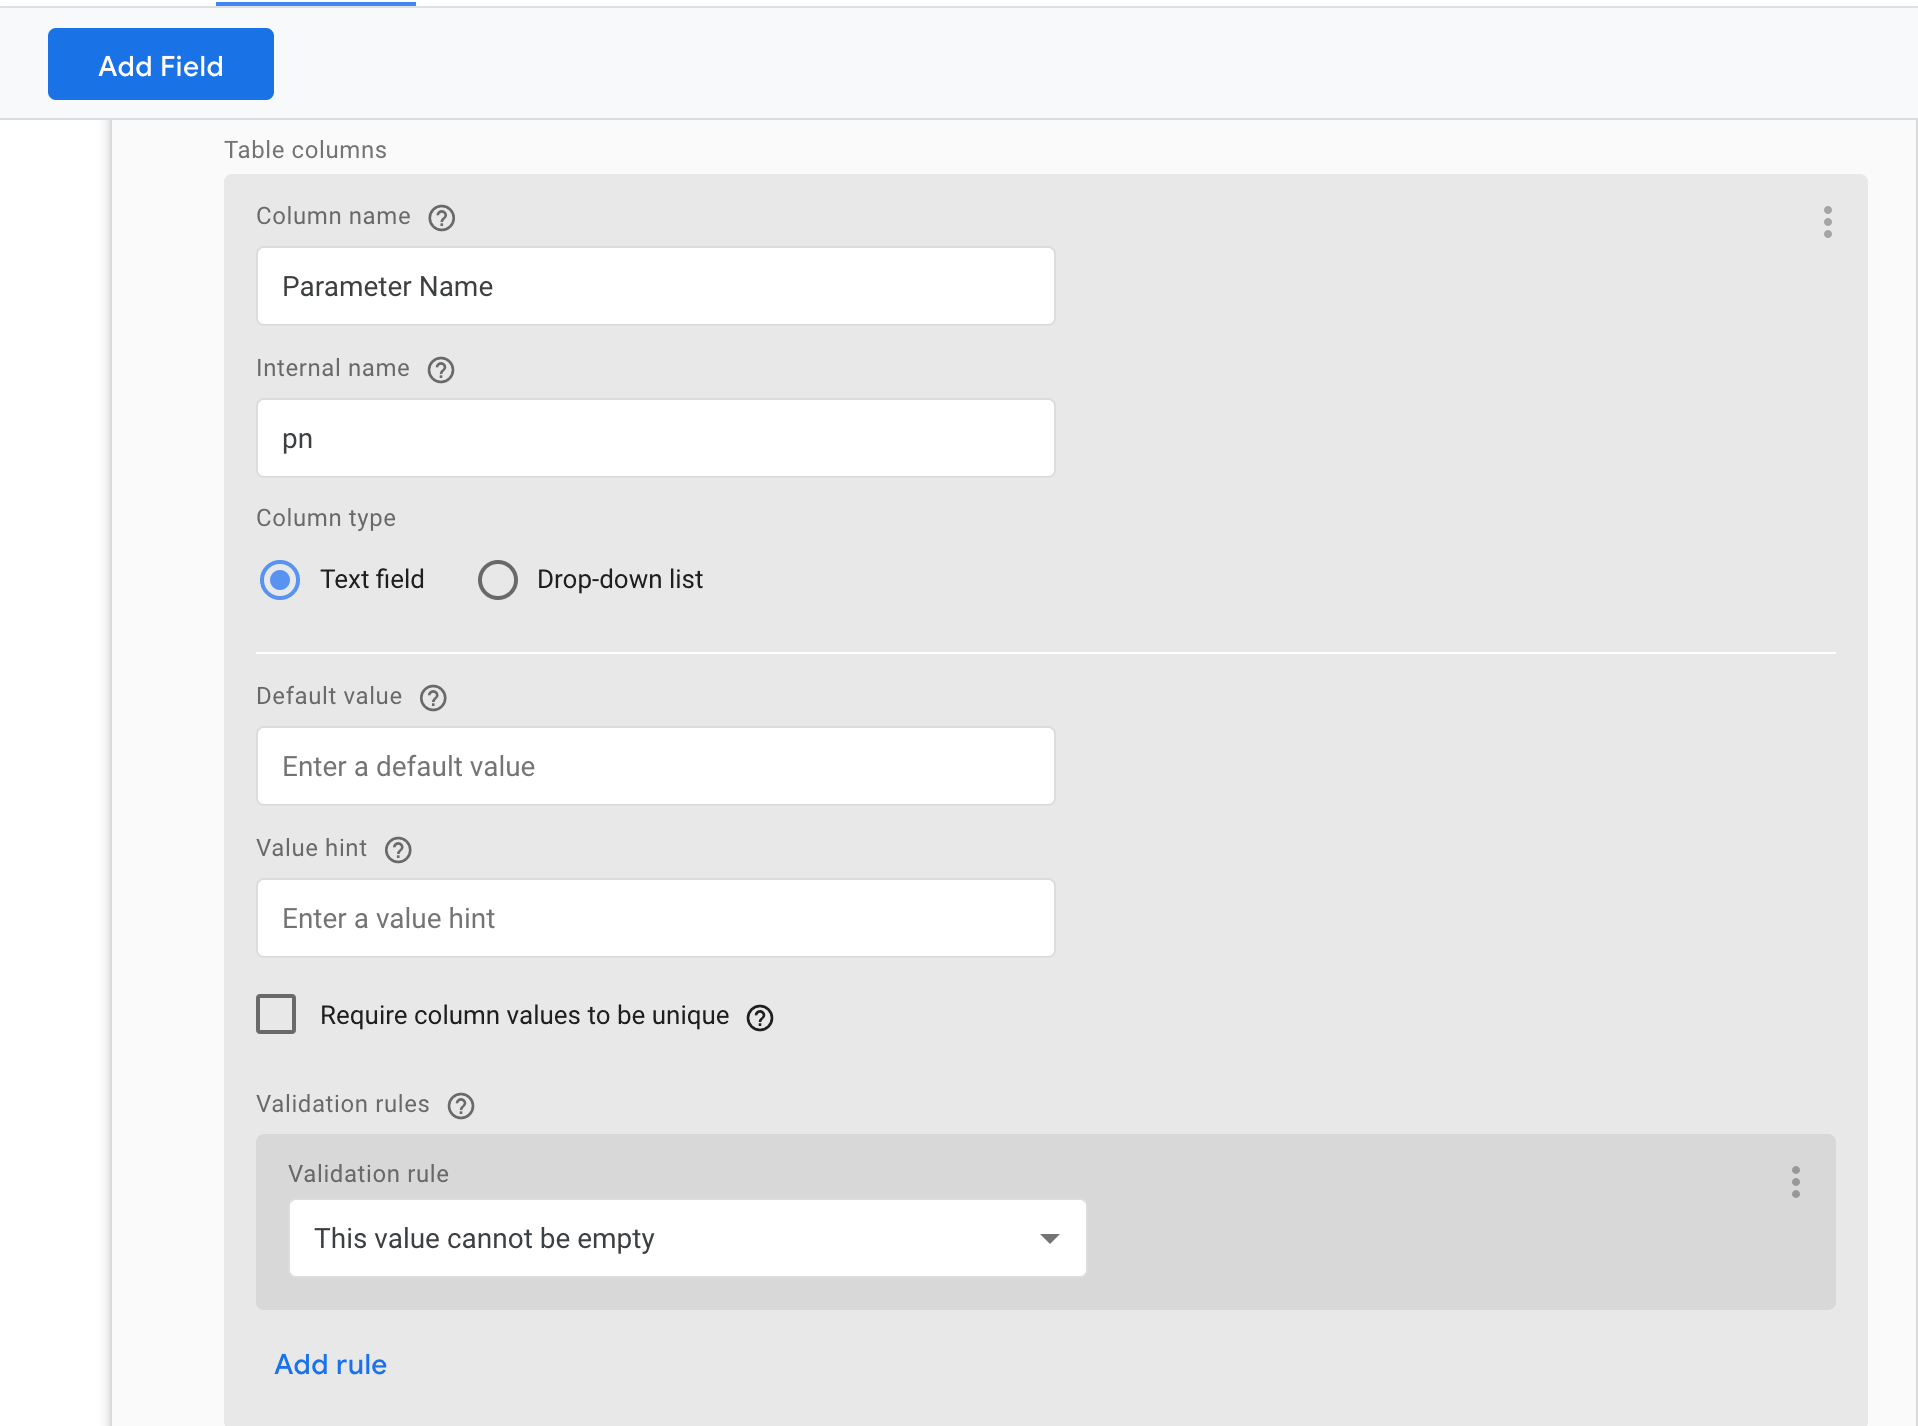
Next, we add the table and configure the columns
Code - Tab
The code here is pretty simple. This function has a single data parameter data that holds all the values configured in the UI for that tag or variable instance, with the keys set to the names of the template parameters specified in the custom template.
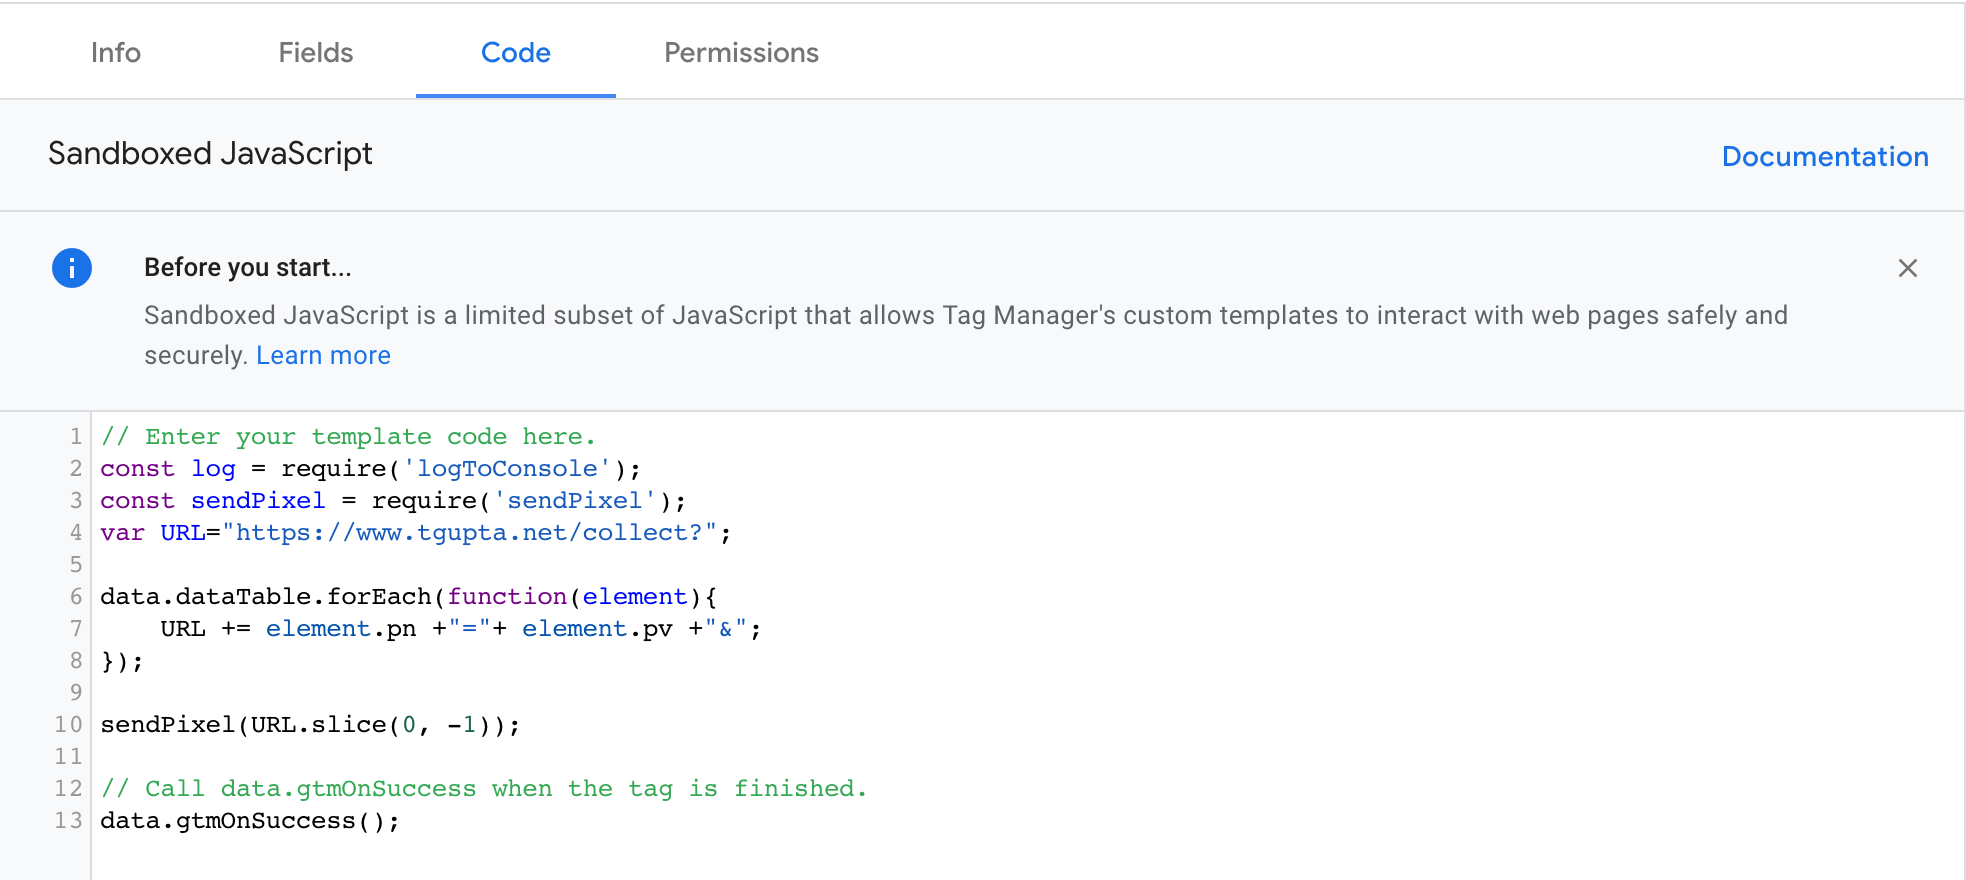
For our example, we just want to pull the values of each parameter that the user will enter in the fields to set section, combine them to form a query parameter string, append to the URL and then simply send the pixel
We need at least one parameter to send and so we add a mandatory field validator. Add the code and click save. You can always test the code with the test button at the top right bar. The logs will let you know the schematic errors and logs if you want to debug.
    // Enter your template code here.
    const log = require('logToConsole');
    const sendPixel = require('sendPixel');
    var URL="https://www.tgupta.net/collect?";

    data.dataTable.forEach(function(element){
      URL += element.pn +"="+ element.pv +"&";
    });

    sendPixel(URL.slice(0, -1));

    // Call data.gtmOnSuccess when the tag is finished.
    data.gtmOnSuccess();
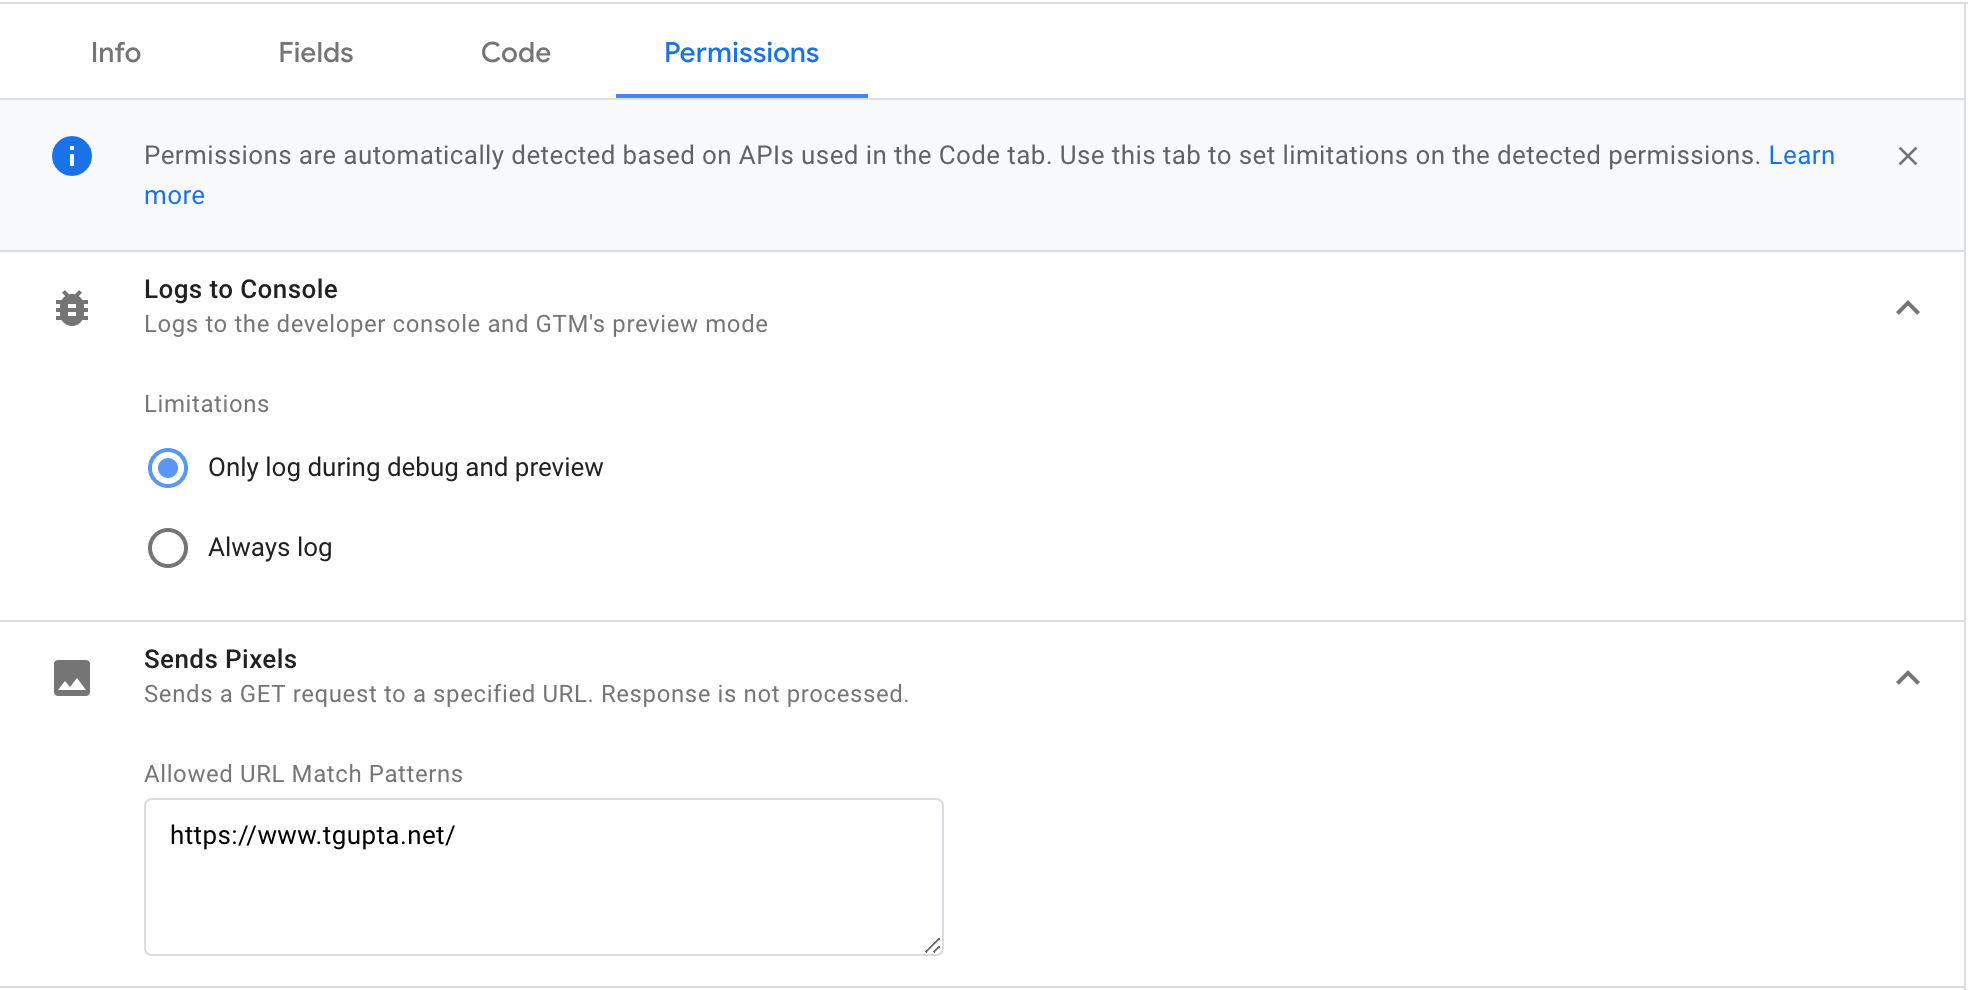
Permissions - Tab
The permission tab is the most critical piece in the setting of the template. Here you define what your tag template can do. For our example, we made it mandatory to send the pixel only if the URL of the pixel matches our domain.
Using our tag template
Using the tag template is easy.
- Go to tags in Tag Manager on the left bar.
- Click New Tag
- Select the custom tag we created. Add the fields to set
- Add the triggers
- Preview and Publish
Conclusion
Custom Templates is a new topic and I am sure you guys would have a lot of queries and concerns. Please leave your questions here as a comment and I will try my best to answer them.